Saturday, May 25, 2013

SHELL EXPLORATION

During the first week of April, I went on vacation in Florida and was able to bring back an abundance of exotic seashells.  I had decided to focus on Nature Materials during April and this fit in beautifully.  I laid out shells on trays with magnifying glasses and also included a book about shells.  The conversation that was inspired was amazing.  The children started their observations and immediately started commenting on the different types of shells, the different colors and sizes of the shells, and of course, how they could hear the ocean in the shells.    
Some of their words..."Some are prickly".  "Some are smooth".  "I noticed something, this one has stripes, and this one has stripes"!!  "Look, it has purple inside this one".  "Some have holes in them".  "Some are bumpy".  "Hey, I think I see water inside this".  "Oh it must be the sea you are listening to".  "No, I 'm looking, I see puddles".  
More words..."Something big would've had to live inside"!  "You can see these little dirt spots from the ocean".  "You might see a little rainbow if you do this" (put magnifying glass close to your face).
I
Here is a child trying to match the shells on his tray to shells in the book.
I continued to support the children by offering paper and pencils so they could trace shells, write about shells, and document what they saw.  


COLOR EXPERIMENTS PART 2

I was so excited to use our new test-tubes for some more color experimenting.  I added water to each test tube, and again gave them each the three primary liquid watercolors and pipettes.  The children decided themselves which colors to put where, and how much.  They really got engaged in adding one color to the water, adding a second to see what happens, etc. 


This child wanted to get a closer look, so she took the test tube out of the holder and also gave it a shake to mix the colors more.
This was a great learning experiment.  We used polyfil and tried to mix our colors on it.  What we discovered though is that polyfil does not absorb liquid, so the colors did not really stay or mix on the polyfil.  It led to a great discussion about absorption and what that means!  I love teachable moments like this.

Our final experiment with color this month was seeing what happens when we add white and black to our colors.  Earlier, we sorted paint color samples and chips into piles.  Then each child chose a pile to work with and picked a color to try to match by mixing white and/or black with a primary or secondary color.  


PRIMARY AND SECONDARY COLOR EXPERIMENTS

We continue on our journey of mixing colors and start to learn the difference between primary colors and secondary colors; the name of the colors you get when mixing primary colors together in different combinations.  This was a game we played at circle.  Each child was given a heart and had to figure out if the color they had was primary or secondary and then they put it in the appropriate basket.  As you can see, they mastered this game very well! 


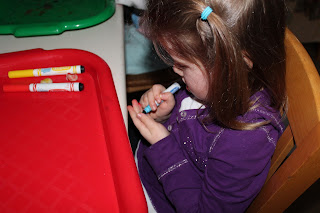
Here, we started with plain colored playdough and used markers to color the playdough with primary colors.  Next, we mixed the colors together, two at a time to get our secondary colors.  

The children had to work with the playdough for a bit to mix the colors properly.

It was hard work and a little tricky to color our playdough.

Next color experiment...shaving cream!  The colors didn't come out as colorful as I was hoping, but it still showed how mixing primary colors together yields new colors. 

This experiment was as bright and colorful as I had hoped.  The children were given coffee filters and pipettes.  As we have been doing, they had the 3 primary colors to start, and mix together to make their secondary colors.  This child really got engaged in this project.  Observe his concentration as he carefully drips colors together to make new ones.
This child kept the primary colors separated at first, and then started experimenting by adding drops of color to the primary colors to create secondary colors.  


Friday, May 24, 2013

MORE COLOR MIXING

I gave each child the three primary colors, a piece of paper and some q-tips.  They experimented with all of the primary colors and began to make some secondary colors.

This younger child mixed the colors up and started painting.  It is fascinating to see how each age group approaches this activity.  
This child made a circle of dots using the head of the q-tip.  I love how each child chose different ways to experiment!


This child made a person using his colors.  I love how he separated parts of the person by color, and then started mixing more towards the end.  

PRIMARY COLORS

We spent the month of March mixing colors.  We started by learning about the three primary colors, or first colors.  We learned that you can't mix anything to get red, blue, or yellow.  But, what happens when you mix combinations of primary colors together?  First, we made a chart of equations and tested out the different combinations.  I wrote the different colors down to help them with spelling, but they were able to figure out which color was which by sounding out and figuring out first letters.  Beginning reading!!
This child is writing down the first two primary colors she is going to mix together.
Here she is mixing red and blue together.  Once she figures out what color that makes, she will add that to the first equation she started to write out.  Math, literacy, and science in this project!
Mixing...
Writing...you can really see the equations in this picture.


Lots of mixing and writing! 

Thursday, May 23, 2013

PUPPET STORIES

The children love to hear my puppet stories and often beg for them during circle time.   On this day, they each got to choose two puppets and make up their own story to share with the group.   They chose from a ladybug, lion, bumblebee, frog, and pink elephant.  They really enjoyed creating their own imaginative puppet stories.  Storytellers in the making!!